


INBARASAN R
Developer
Updated on
16-02-2026
How to Create an Agent in the June AI Platform
With June AI, you can design a custom assistant that will create an intelligent assistant based on your needs. The assistant has the capability of responding to user interactions, working with available tools, connecting to external systems, and leveraging knowledge sources according the rules/instructions provided by you.
This guide walks you through each step of creating and configuring an agent inside the June AI platform.
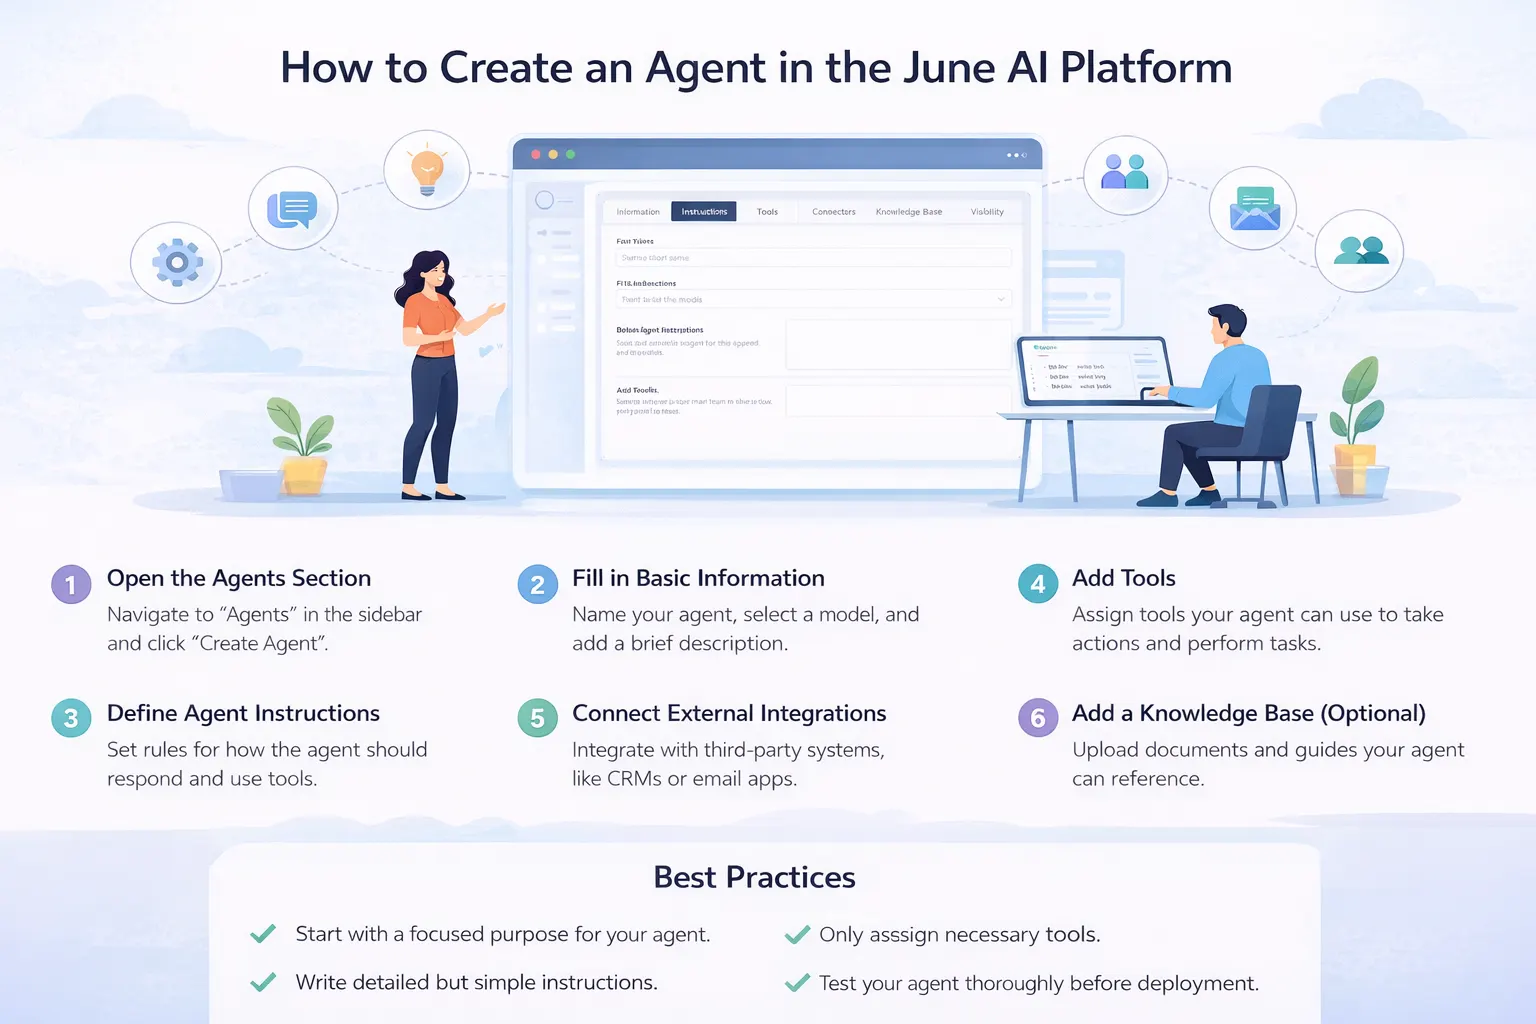
Step 1: Open the Agents Section
From the left sidebar of your dashboard, click on Agents. Then click the “Create Agent” button in the top-right corner to start building a new one.
Step 2: Fill in Basic Information
Agent Name
Give your agent a short and meaningful name. Choose something that reflects its purpose, such as Sales Assistant, Customer Support Bot, or Compliance Advisor.
Model Selection
Select the AI model that best fits your use case. Different models may vary in performance, speed, and reasoning ability. Choose one based on the complexity of tasks your agent will handle.
Country
Choose the country relevant to your agent. This helps tailor responses based on regional context, regulations, or business requirements.
Description
Briefly describe what your agent is designed to do. For example: “This agent helps the sales team qualify leads, collect customer details, and trigger onboarding workflows.”
Initial Prompt for AI
Provide a short starting instruction that defines the agent’s tone or purpose. This acts as the first direction given to the AI when it starts interacting.
Step 3: Define Agent Instructions
In the Instructions tab, define how your agent should behave. This is where you set rules, tone, response style, and boundaries.
You can specify:
- How the agent should respond to users
- When it should use tools
- What type of tone it should maintain
- Any limitations or restrictions
Clear instructions improve accuracy and ensure consistent behavior.
Step 4: Add Tools
In the Tools tab, you can attach tools that your agent is allowed to use. These tools enable the agent to perform real actions such as creating leads, sending emails, or retrieving data from your system.
Search and select the tools you want to assign. Only the selected tools will be accessible to this agent.
Step 5: Connect External Integrations
Under the Connectors tab, you can add integrations that allow your agent to communicate with third-party platforms. This might include CRM systems, email services, payment gateways, or internal databases.
Step 6: Add Knowledge Base (Optional)
If your agent needs access to documents, policies, or internal guides, upload them in the Knowledge Base section. The agent can reference these files when answering questions.
Supported formats typically include documents such as PDF, Word, Excel, CSV, and text files.
Step 7: Manage Visibility and Access
In the Visibility tab, control who can view or edit the agent. You can search for team members and grant appropriate access levels. The creator is usually assigned as the Owner by default.
Final Step: Create the Agent
After reviewing all settings, click the Create button. Your agent is now ready to interact with users, use tools, access knowledge, and automate workflows based on the configuration you’ve defined.
Best Practices
Set a clear purpose beforehand. The agent’s role must be very specific (in order for it to perform correctly). Write simple, detailed instructions for the agent so that you give it clear instructions and reduce any chance of unexpected results. Only give the agent the tools it needs to do its job (this keeps your workflow secure and manageable). Test your agent extensively before making it available to a live audience to ensure that it works exactly as expected.